

Hi mCommunity,
It’s been a minute! One of my favourite aspects of my role as an Implementation Manager is that I get to work with clients from diverse industries. While each client has varying goals, many of them share a common objective: competitive benchmarking.
When new clients begin their journey with Meltwater, the process of structuring their accounts and mapping out their searches can feel overwhelming. While immediate needs may require quick, temporary searches, it’s important to also plan for the long-term structure to support consistent reporting and ongoing projects.
For instance, whether you’re reporting on competitive Share of Voice monthly, quarterly, or on an as needed basis, it’s ideal to set up each competitor in its own dedicated search. I’ll highlight why this simplifies your reporting process in a moment. But first, let’s take a step back and explore how consolidating multiple competitors into one search can complicate your SOV or benchmarking reports.
Say your search is set up like the following, where competitors are grouped together using the OR operator to capture mentions of any of these brands:
("First Aid Beauty" OR @FirstAidBeauty or "Paula's Choice" OR "Paulas Choice" OR #paulaschoice OR @paulaschoice or "Drunk Elephant" OR #drunkelephant OR @mydrunkelephant or "Ole Henriksen" or @OleHenriksen)
While this setup works for general monitoring, it can be sticky when creating templated or customized reports in Analyze.
Analyze uses criteria from Explore (saved searches or tagged content). If your search consolidates multiple competitors into one, your SOV report may look something like this:
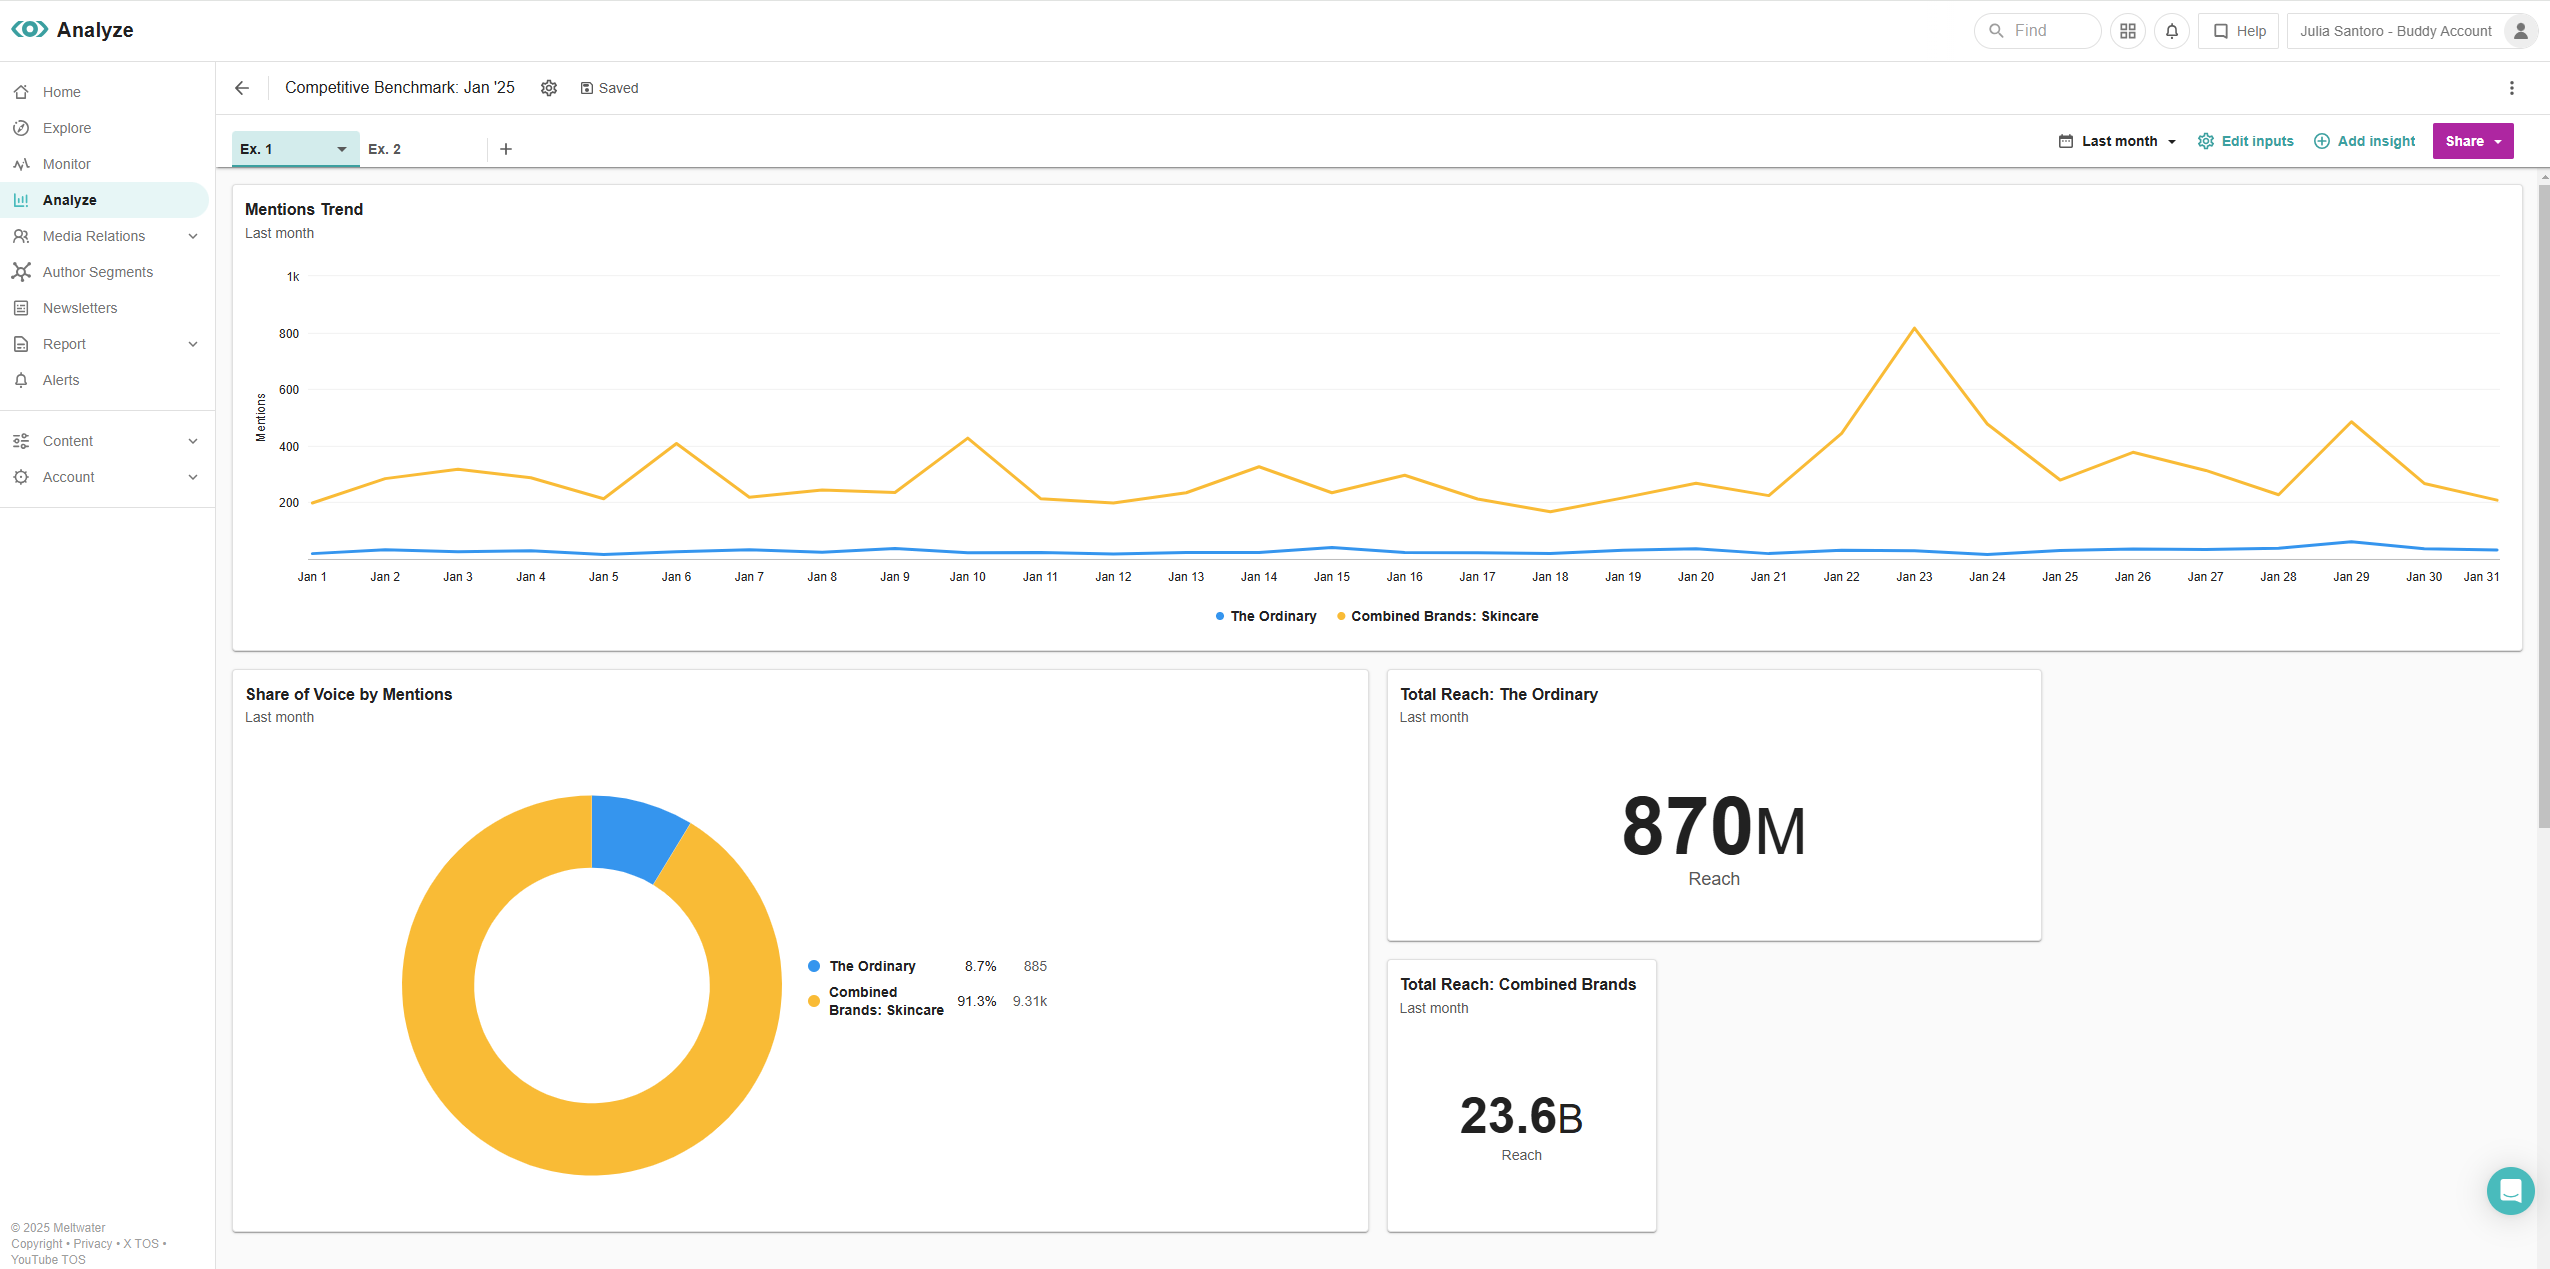
When grouping competitors together in a single search, the data becomes mixed, making it difficult to compare one brand to another, and to your own. This results in an inaccurate reflection of your brand’s performance and doesn’t provide clear insights for each competitor.
To get a more accurate picture of where you stand relative to your competitors, it’s important to set up each competitor in its own individual saved search. This allows Analyze to generate insights based on each search, leading to a much more precise illustration of where you stack alongside your competition.
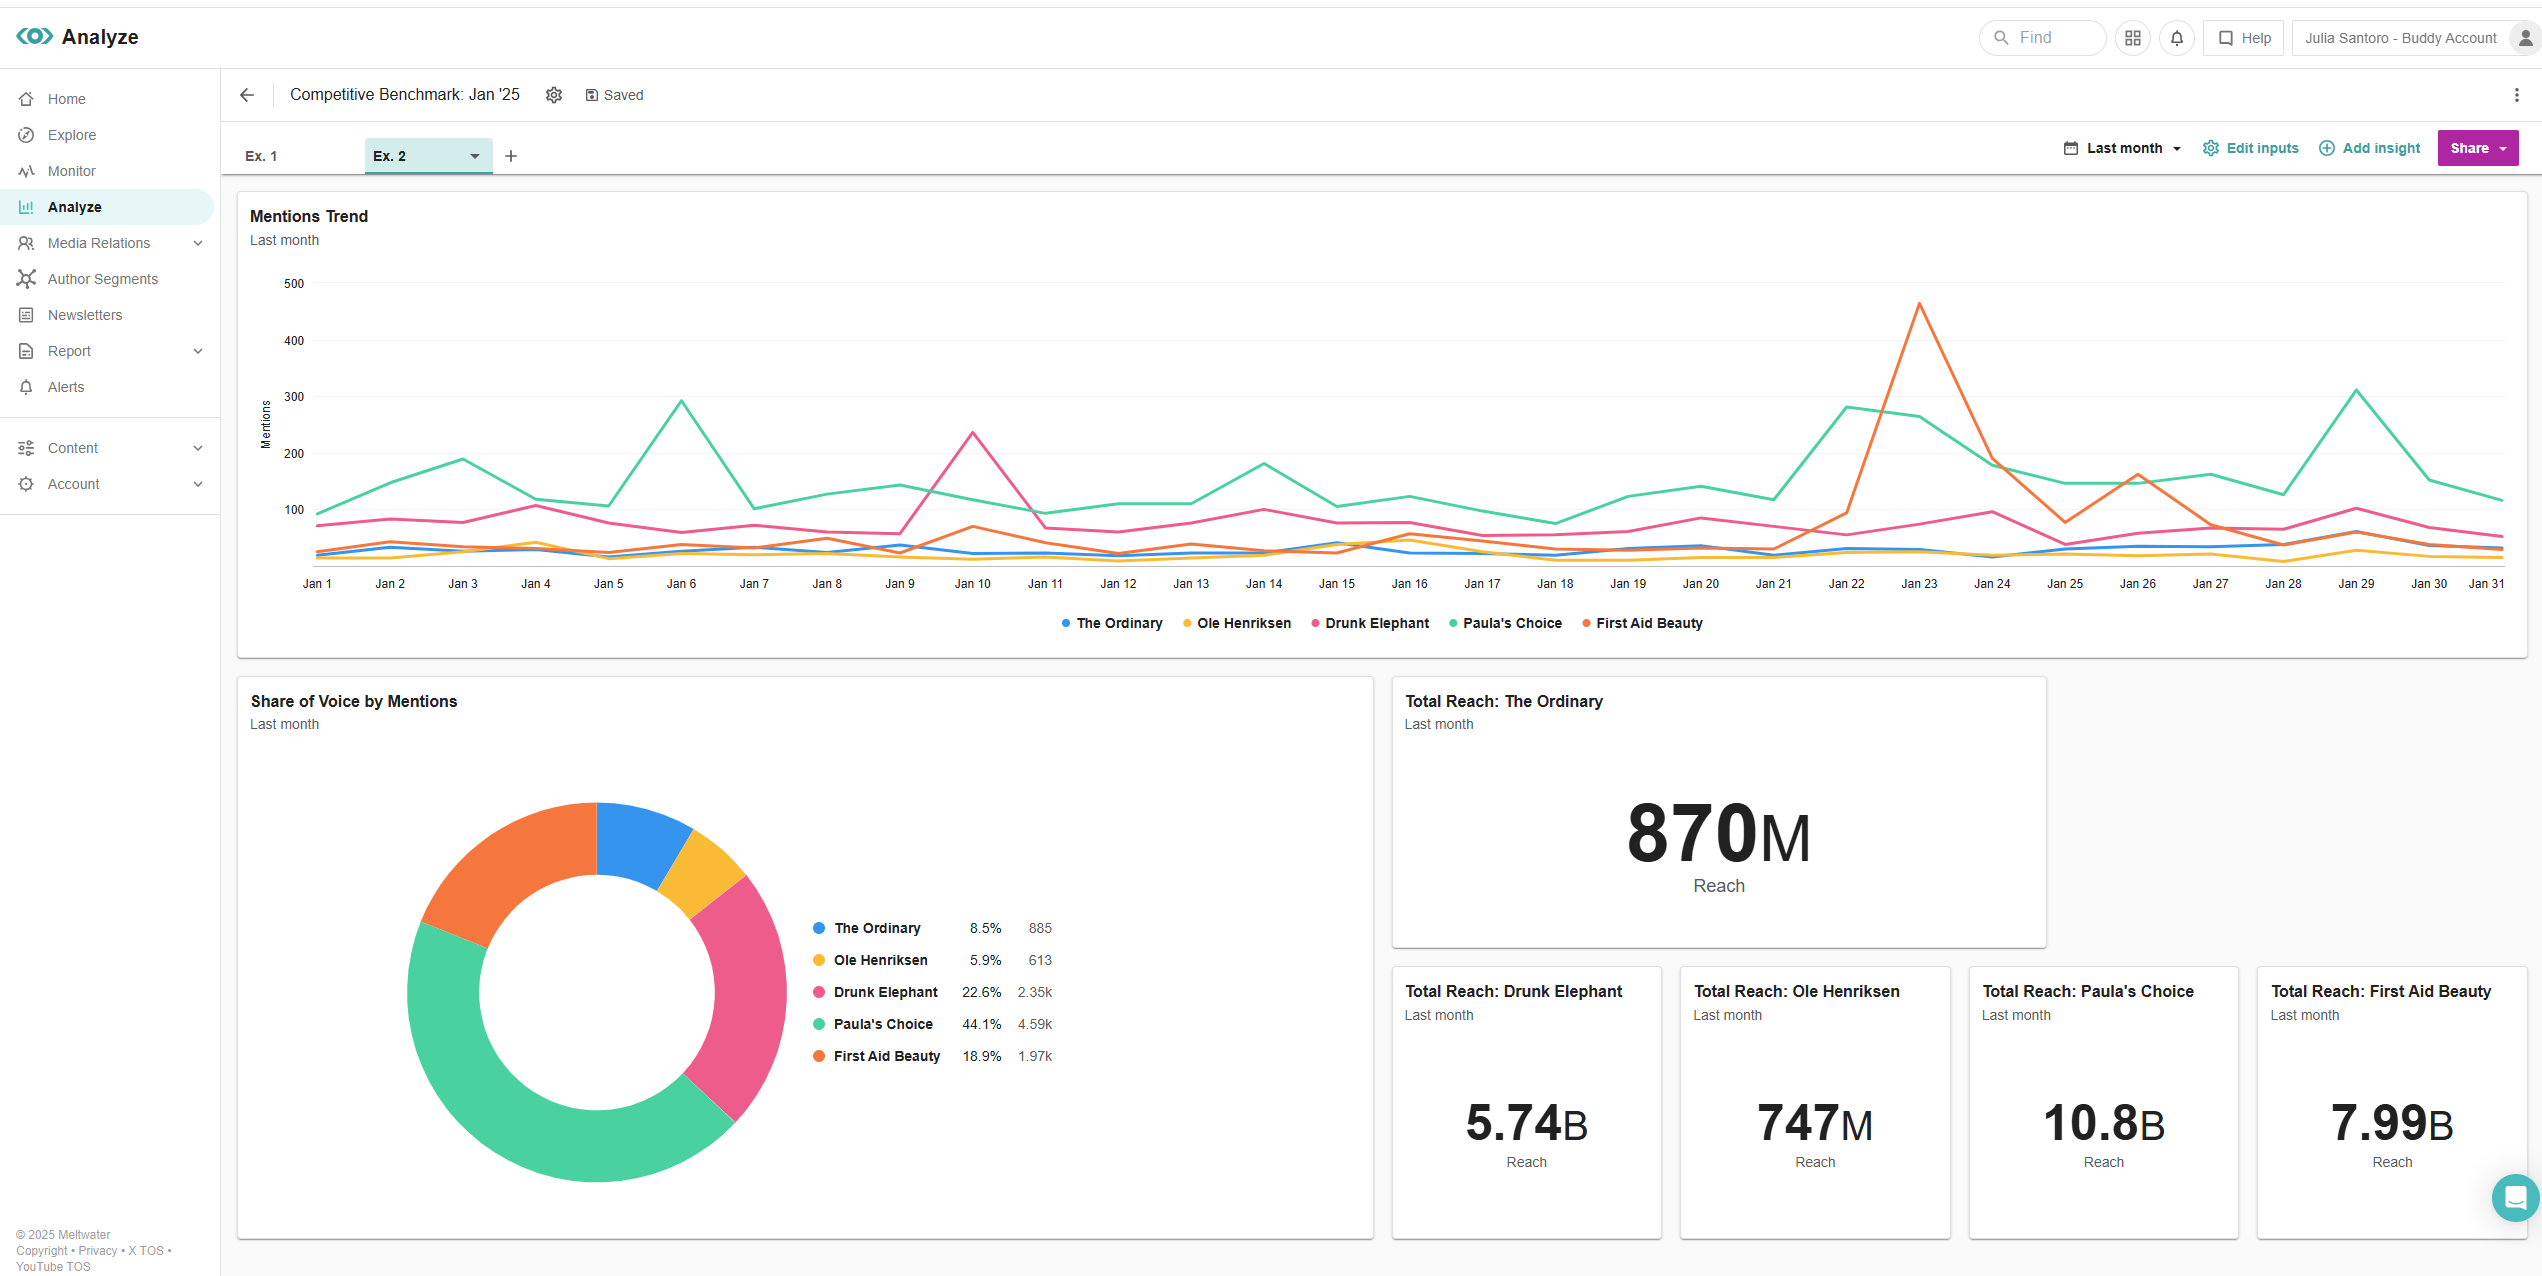
If competitive benchmarking is a priority for you and your team, I highly recommend structuring your account this way, as it ensures better data accuracy and more actionable insights.
To maintain consistency across your reports, make sure each search reflects the same criteria. For example, filtering out stock mentions or retweeted content can be applied directly within the search in Explore. Alternatively, if you need to report on SOV for news only, but still need to monitor for all source types without altering your reporting, you can apply a source type filter within Analyze without making any changes to your searches.
To do so, select Edit Insight, select the Filters tab, select your source types, then Apply.
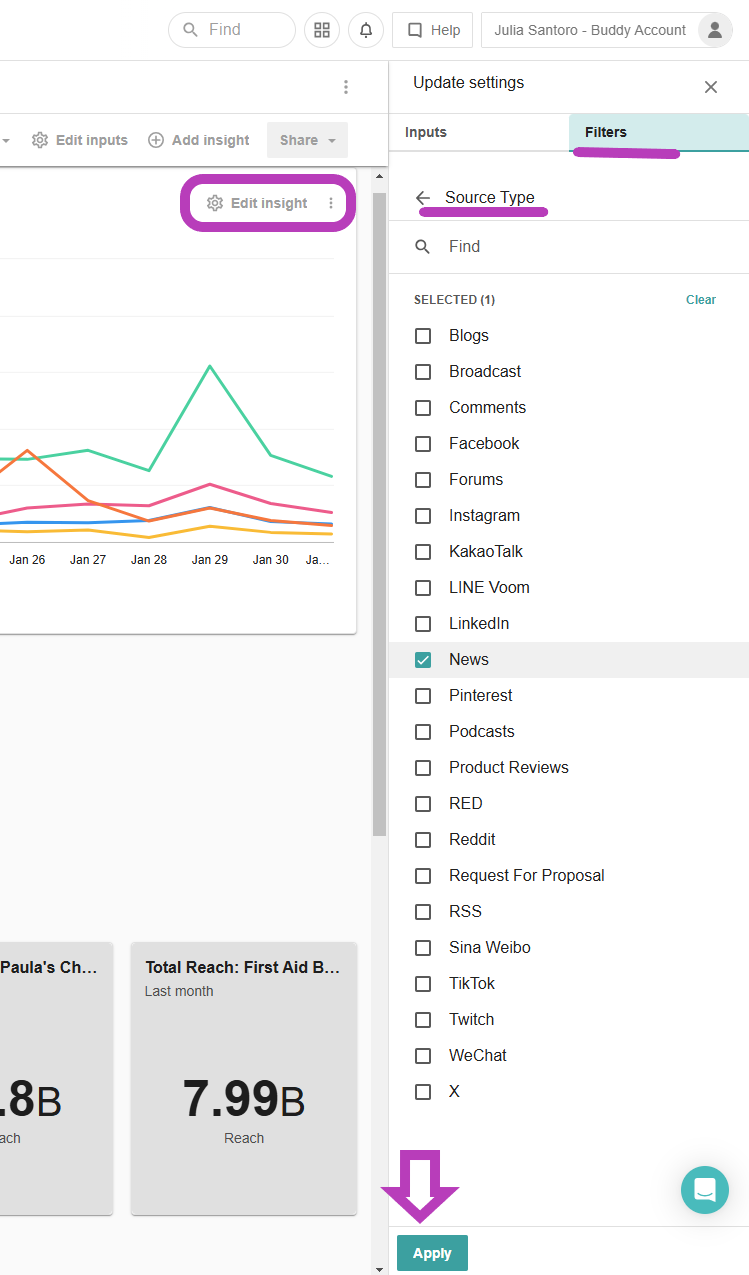
This allows you to tailor your reporting without changing your original search setup.
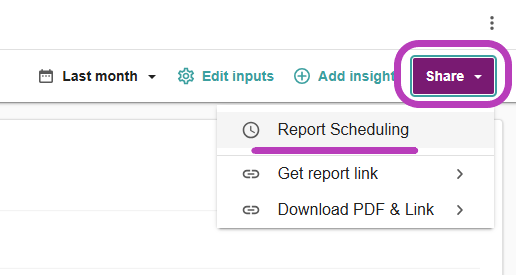
Once you’ve laid out the groundwork for your report, did you know that you can set up Report Scheduling on a weekly or monthly basis? This is available from the purple Share button in the top-right corner. You can also download a PDF or generate a live link for ad-hoc sharing.
I hope this breakdown was helpful. If anyone has their own tips to share or any questions on how to structure your account for easier reporting, please feel free to write them in the comments below. For tips on templated dashboards in Analyze, check out Cheyenne’s recent post: Unlock the Power Dashboard Templates