


As a Meltwater App Administrator, you’re responsible for managing user access to both the Meltwater platform and Meltwater Copilot App. Follow these steps to add and manage your Copilot users:
Before You Begin
Before adding and managing your users, it is important to understand the different access and seat types. Your Meltwater subscription includes access for three user type options:
| User Type | Application Access | Seat Type Used |
| Meltwater Platform Only | Meltwater | Platform User Seat |
| Meltwater Copilot Only | Microsoft Teams | Meltwater Copilot User Seat |
| Both | Meltwater + Teams | One seat each (Platform + Copilot) |
Note: You can assign users based on the number of seats purchased for each product.
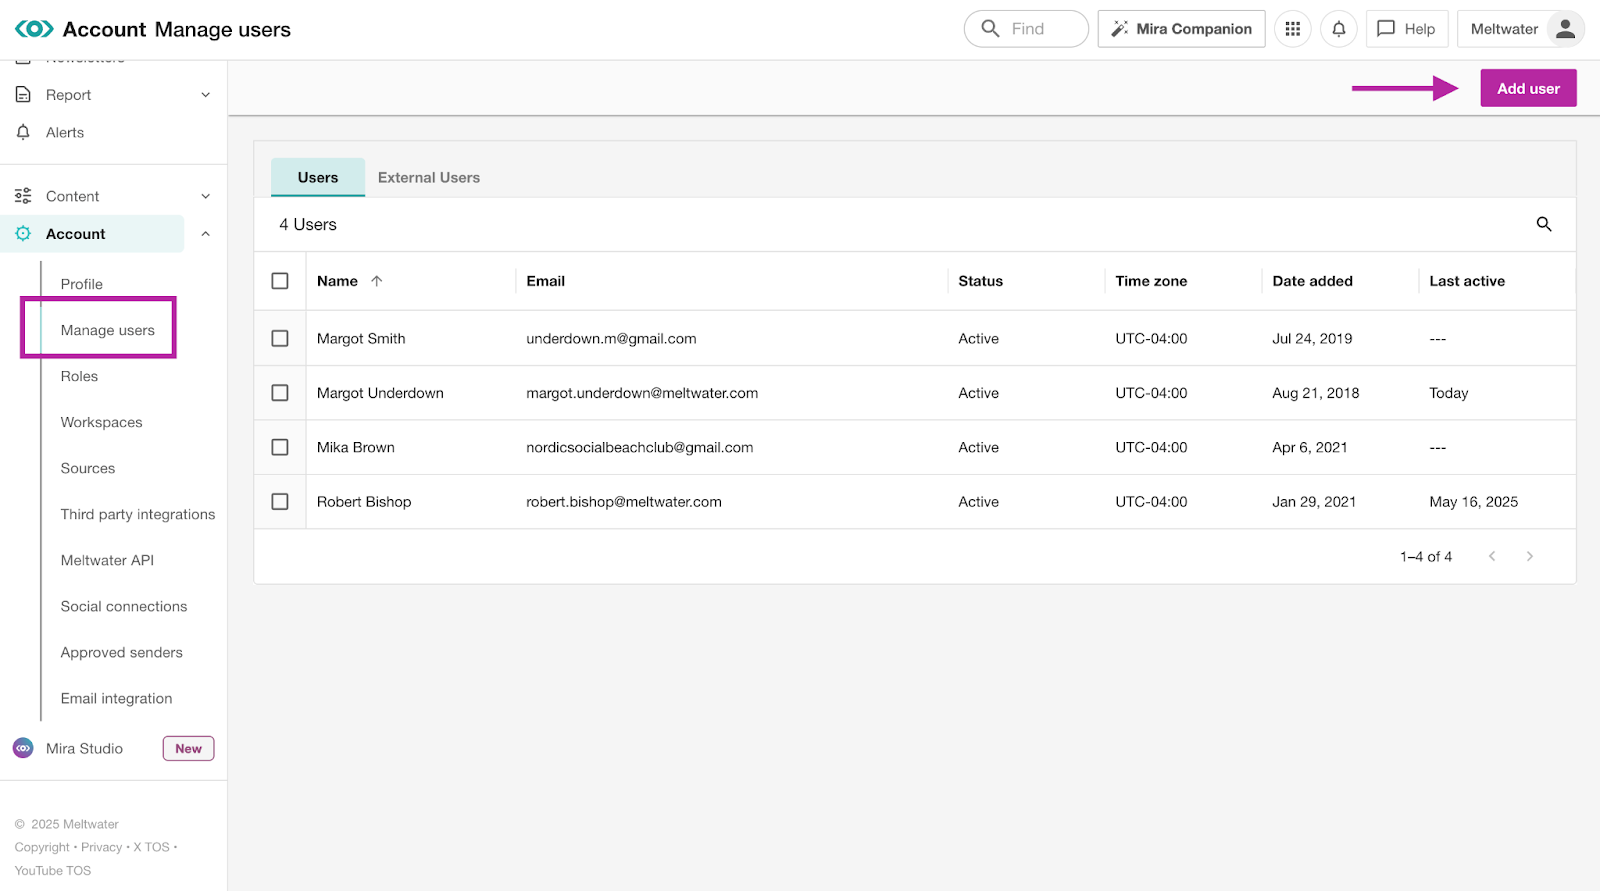
Adding a New User
To add a new user, follow these steps:
- Select the Account drop-down in the left-hand navigation bar
- Click Manage Users
- Select Add User in the top right-hand corner
- In the User Details Section, enter the following details:
- First Name
- Last Name
- Email Address
- Check the Send email invite checkbox. 🔔 Important: This is required for the user to receive their login and setup instructions.
- Time Zone
- Language (Note: Copilot is optimized for the English language only)
- Workspaces (optional but recommended feature for users of the Meltwater platform. Helps organize projects, data, and collaboration more effectively. Note: Not currently integrated with Copilot, but may be supported in the future.)
- Navigate to the Applications section
- Click each application to select or deselect it
| Selection Option: | Gives Access To: |
| Meltwater | Meltwater platform only (Default selection) |
| Teams | Copilot access in Microsoft Teams only |
| Click both Meltwater & Teams | Meltwater platform + Copilot in Microsoft Teams |
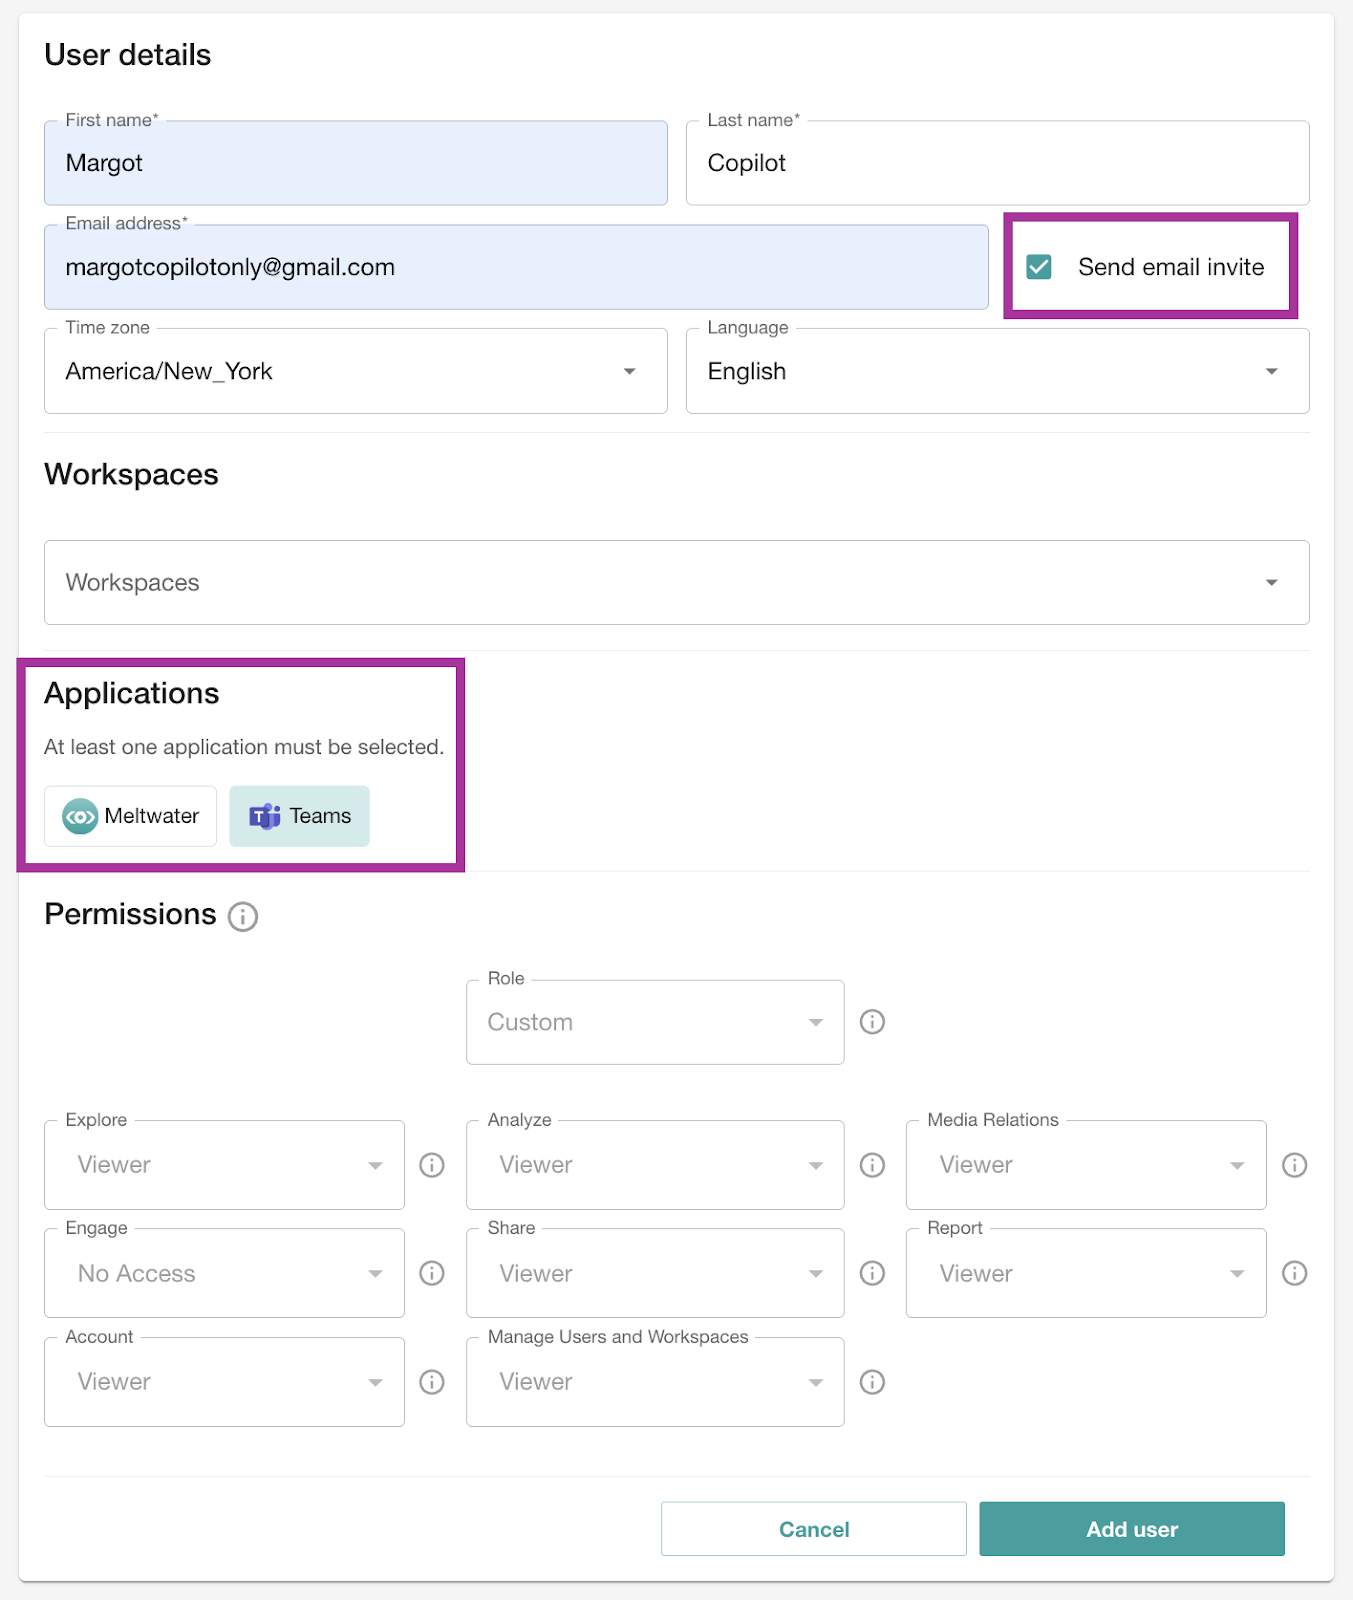
- Assign user Permissions.
Note: This section is for users with platform access and will be disabled if only the Teams application is selected. Learn more about Permissions.
- Click Add user
What Happens Next?
Once a user is added:
- Platform-only Users: Receive an email invite to set up their Meltwater login.
- Platform + Copilot users: Receive an email invite to set up their Meltwater login.
- Copilot-only Users: Receive an email invitation to set up their Meltwater login—required to install the Copilot app—along with step-by-step installation instructions.
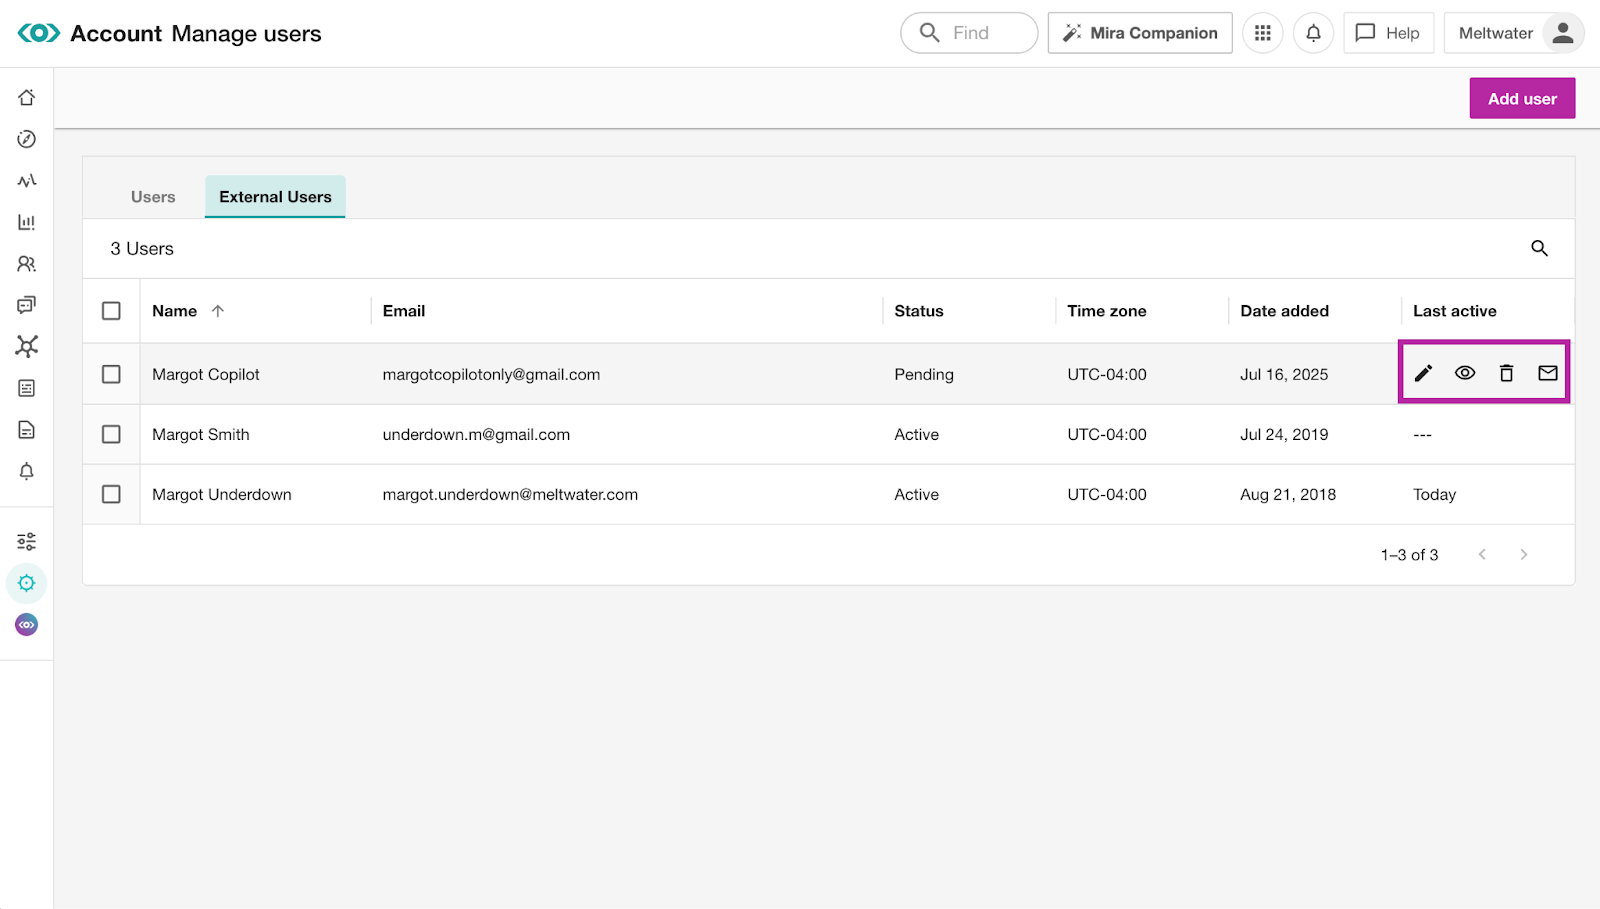
Managing Existing Meltwater Copilot Users
To manage existing Copilot users, follow these steps:
-
Select the Account drop-down in the left-hand navigation bar
-
Click Manage Users
-
Select External Users to manage copilot access
-
Choose between the following options:
- Edit user access/permissions: Click the pencil icon next to their name to update their application access or settings.
- Delete user: Click the trashcan icon to remove their access.
- Resend invite: If a user’s status is marked as Pending, it means they haven’t completed their Meltwater login setup, click the mail icon to resend the invitation email.