Happy to close out October with a few updates to improve your Explore experience:
Rules-Based Automations
Introducing a customizable rules engine to automatically take actions on relevant articles in your searches. Create unique rules to auto-tag, modify sentiment, or even hide mentions in your results, all triggered by the presence, or absence, of specific keywords.
Note: An early version of this feature was released in June for Engage users to apply rules to messages in Conversations. Now it’s available for general search results.
Customers with both Engage and Explore will be able to choose the type of content they want their rules to be applied to.
Use rule-based automation to streamline your daily workload by tagging content, changing sentiment, or hiding irrelevant mentions - saving you valuable time!
How does it work?
To get started, navigate to the new Automation sub-option under Content.
Here, you will see any rules you have already created in the table. The table includes search and sorting options.
Columns include:
- Name: name of the rule
- Summary: description of the rule
- Last edited by: the last team member to save changes to the rule
- Type: the type of content the rule will be applied to: Saved Search results, or Conversations messages
- Last edit: the day and time of the last saved edit
To create a new rule, click the purple Create Rule button. In the pop-up, you will fill out the necessary information to create a new rule.
Once you’ve completed this information, follow these steps to set up your automation:
Step 1: Select your criteria, conditions, keywords, and phrases.
If a new article or post…
- Mentions words or phrases (applies rule if any defined word or phrase is in the message)
- Does not mention words or phrases (applies rule if any defined word or phrase is NOT in the message)
After selecting one of these criteria, choose your conditions and enter your keywords and phrases.
Step 2 - Select the action to take when your criteria are met.
Under …then take this action, select which action you want the automation to take. You can choose:
- Apply Tag
- Change sentiment
- Hide post
You can add multiple actions to a single rule. For example: When an article or post matches the criteria, you can Apply a tag, Change the sentiment, AND Hide the post with one rule.
Step 3 - Click Create!
Once you are satisfied with your rule, click Create. Your rule will automatically begin running for all Meltwater users in your account.
All rules apply going forward from the time of creation, and you can edit or delete your rule at any time. Please note, rules cannot be applied to articles indexed before a rule was created.
Learn more:
- Read the Product Update post for Rules-Based Automations for Fan Messages in Engage
- Get full information on this update and a more detailed walkthrough in the Help Center: Rules-Based Automation for Explore and Owned Social Accounts
Improvement to Content Category Filters
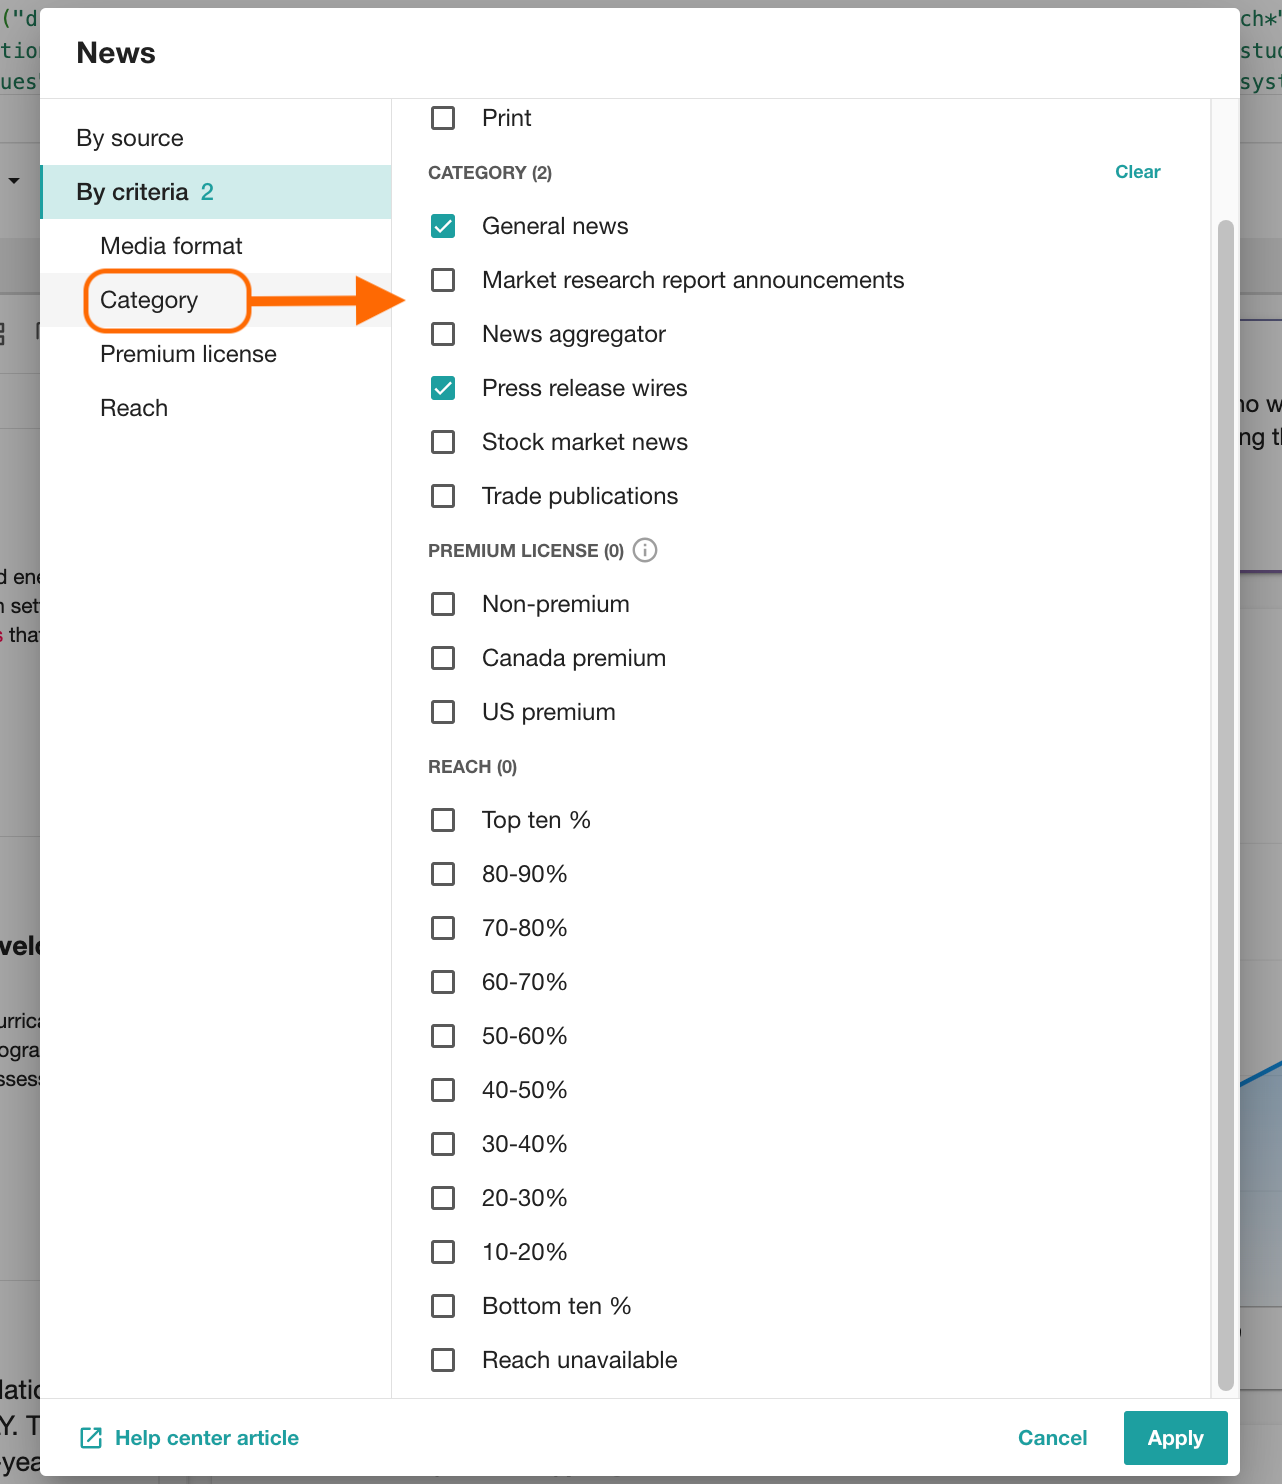
The Boolean behind the outlet type filter in Explore has been updated - and is also available for use in Advanced Searches and discoverable via the Search Assistant. Say hello to our newest boolean operator: contentCategory!
contentCategory is the updated version of the ouletType operator in Explore, released last year. The idea behind outletType was to help you reduce noise by limiting your feed to only the sources relevant to your needs. The new operator improves this experience further. Here’s how it differs:
- Then: The outlet type filters were applied to the entire publication (source), rather than to individual articles. This could lead to missed results and inaccurate reporting.
- Now: Combined sources that include both news and press release wires will apply the filters on the article-level.

How does it work?
To test these new improved filters, simply click on Source Type > News > Category to select or deselect the filters.

You can also use the boolean operator in your Advanced Searches and Custom Categories either manually or via the AI Search Assistant.
| Filter Category | Boolean operator |
| Market Research Report Announcement | contentCategory: "market_research_reports" |
| News Aggregator | contentCategory: "aggregator" |
| Press release wires | contentCategory: "press_release" |
| Trade Publications | contentCategory: "trade_publication" |
| Stock Market News | contentCategory: "stock_market_news" |
| General News | contentCategory: ("news_agency" OR "blog" OR "advertising_paper" OR "magazine" OR "government" OR "job_portal" OR "newspaper" OR "online" OR "other" OR "radio" OR "television" OR "unknown") |
Learn more:
User Interface Improvements
Adding on to our recent bundle of Explore UI Improvements, we have a few more updates to share!
When saving a search using “save as”
Our October 18 update called out that when using the save as function, the name was populated with the previous name + “Copy.” This function is largely unchanged, but the new name will no longer include the text “copy.”
The search contents (including changed filters and terms) will be reflected in the new saved search, and the automatically populated search title will match the original search name. This further streamlines the process by allowing you to edit the name without removing the term “copy” that previously populated.
Add labels to a search when saving
Now you can add labels to your searches as you save them, eliminating the step of applying them from the Content tab or your list of searches on the Explore home page.
Labels are now available when using both the Save and Save As options. You can select from existing labels or create a new one.
This update lets users save and organize their searches in one motion, reducing the time spent clicking around in Explore and gives users flexibility to apply and create labels when they want to do so in their workflow.
