There have been so many updates to Klear lately, we wanted to share this group of small but mighty releases you might have missed. Read on for more on:
Active Campaigns Filter in My Influencers
Use the Active Campaigns filter in My Influencers to create a tailored list of influencers in specific active campaigns. You can select one more more campaigns to create your unique list view.
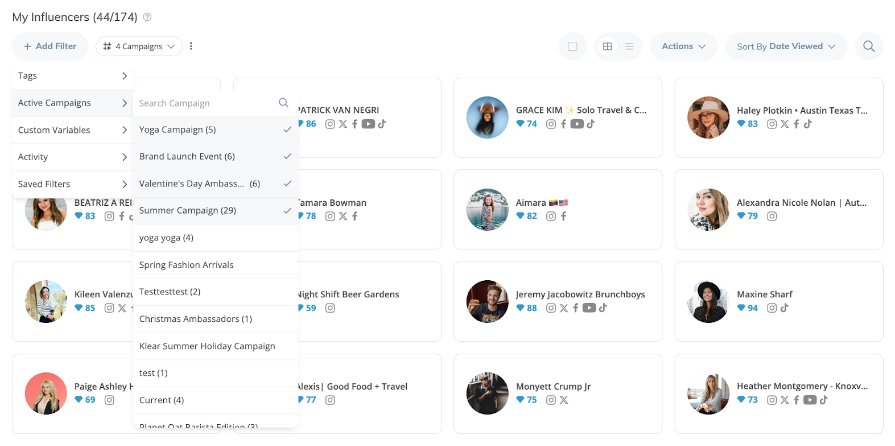
If selecting multiple campaigns, use the dropdown tooltip to configure your list and apply ANY or ALL rules to your group of campaigns.

Learn More in the Help Center: Klear > Managing Your Influencer Network > Creating Targeted Lists
Influencer Communication History in Relationship View in Campaigns
What Is It?
Within each Klear campaign, you’ll view all the influencers within the Manage section within the Members tab. This is where you’ll keep track of and input information about your influencers, such as their shipping address, contact details, and more. The Members tab has two views: Stats and Relationship.
In Stats view, you can analyze the stats of the influencers in a specific campaign. In Relationship view, manage your influencer data points, assign owners, etc.
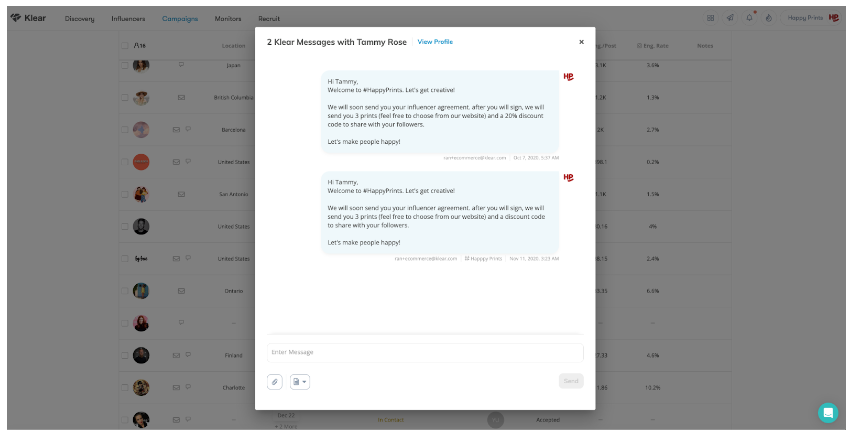
Now, your complete communication history with each influencer is also available through the Relationship tab, including communications from both email and Klear messages.

How Does It Help?
Klear allows you to keep track of your influencers’ information for each campaign, such as shipping addresses, email addresses, influencer preferences, and notes, all in one place. The Members tab in campaigns houses all of this information and acts as an internal CRM system for your campaign.
Adding your communication history with influencers to this tab further consolidates the information you need to help you stay organized and up to date on crucial information, and collaborate with your team.
How Does It Work?
To access the Communication History of Campaign Members:
- Head to the Manage section for your campaign
- Within the Members tab, toggle on Relationship view

- Click on the Email or Klear message button next to the influencer’s profile pic
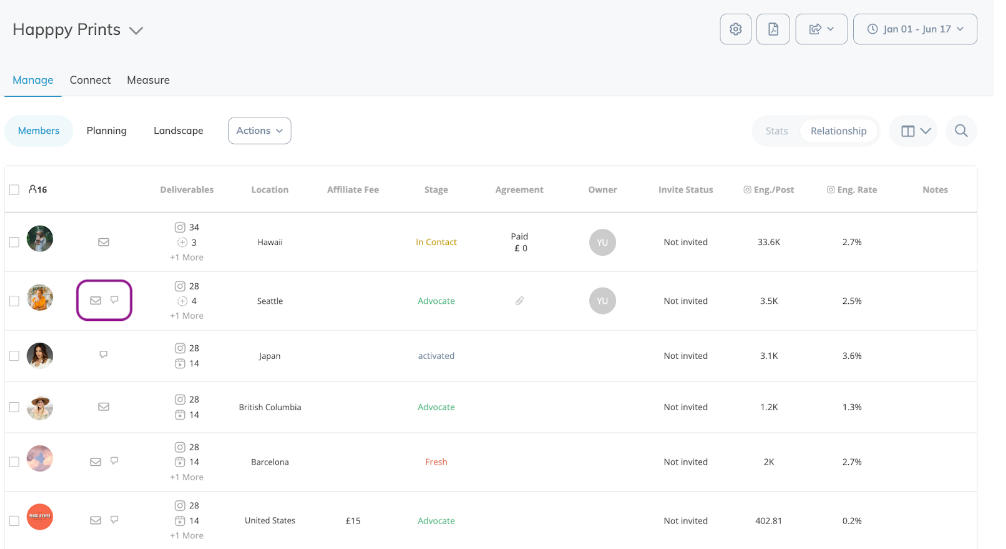
- Within the popup, the full communication history with that influencer will be available for review
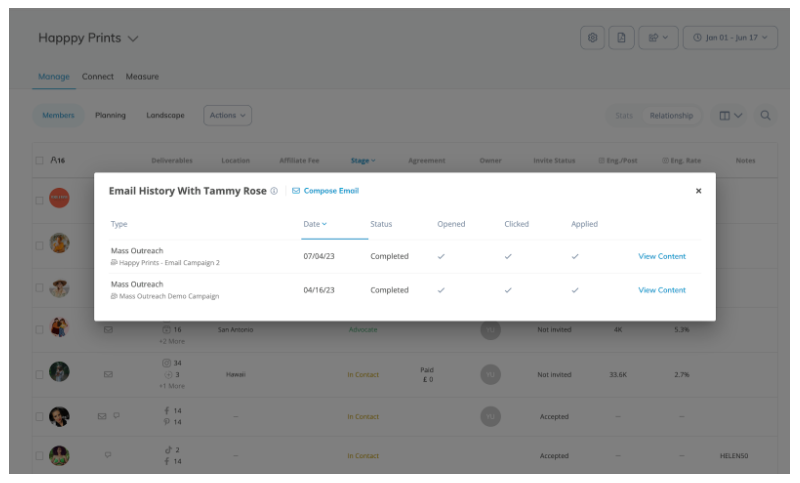
You can also compose and send a new message to the influencer straight from this window
Learn More in the Help Center
Twitch Added as a Social Network in Recruit Application Forms
Now, you can add Twitch as a Social Network to your influencer Application Forms in Recruit 
How Does It Work?
To add Twitch to a new Recruit form:
- Navigate to the Recruit module and select the +Application Form button
- Choose either the Application Form or Landing Page option based on your preference.
- In either Step 1 (for Application Form) or Step 3 (for Landing Page), locate the Social section when creating your form
- In the Social section, select the Twitch icon to add a field for Twitch to your application form.
Note: Twitch cannot be the only social network selected; you must include at least one other social network
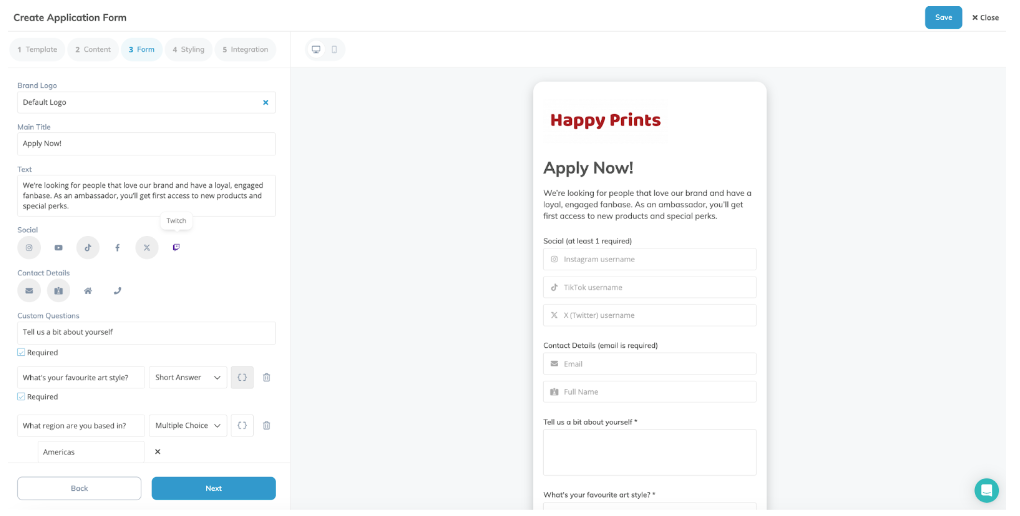
To add Twitch to an existing Recruit form:
- Navigate to the Recruit module
- Find the relevant recruit form and use the kebab menu at the bottom right corner to select the Edit Form button

- Follow the steps above to add Twitch to the form
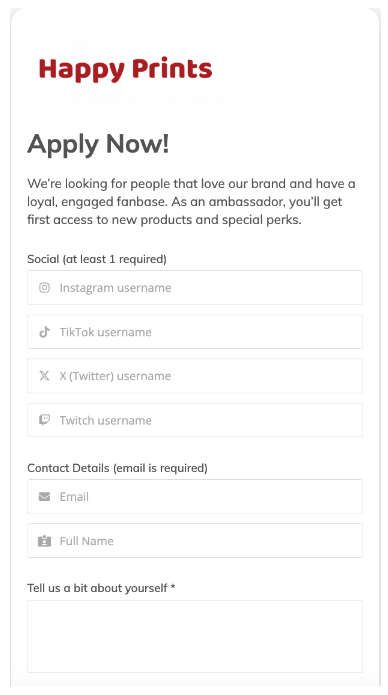
Learn More In the Help Center
Full Connect Action History in Campaigns
View the complete history of all Connect actions taken in campaigns for all influencers, including those no longer part of the campaign. Previously, when an influencer was removed, their Connection action history was also removed.

Updates for Instagram Stories From Unauthenticated Users
Reporting Setting for Expired Unauthenticated Instagram Stories
With this new Reporting setting, you can toggle on or off unauthenticated Instagram story metrics. Use the following steps to update this setting:
- Head to your account settings and click on the Reporting tab
- Scroll down to the Unauthenticated Instagram Stories Metrics section
- Keep the toggle on to keep unauthenticated story metrics in your campaign reporting
- Turn the toggle off to remove unauthenticated stories once they expire (if you haven’t saved the media to your campaign)
Note: the setting you choose will affect ALL users in your Klear account

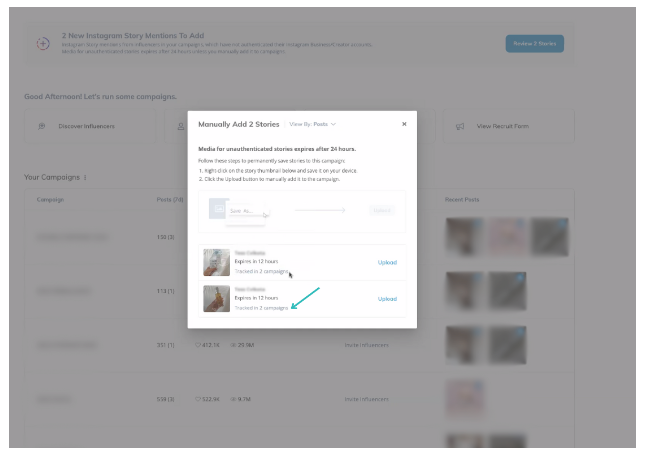
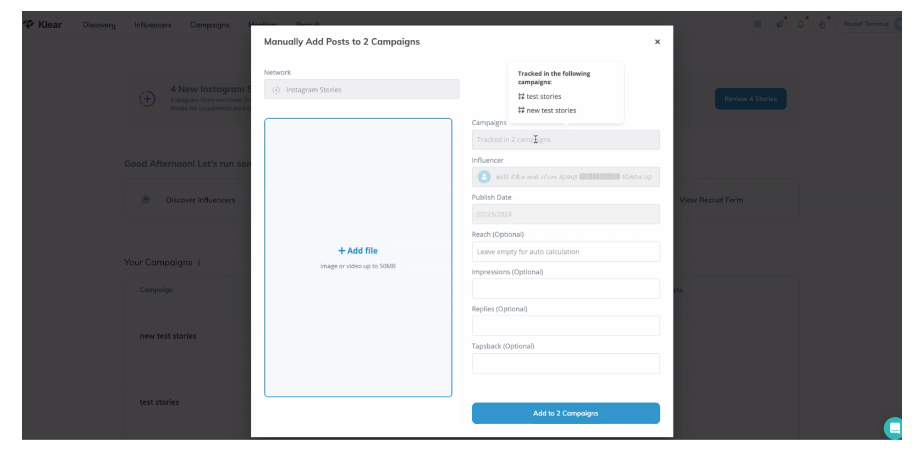
Save Unauthenticated Instagram Stories to Multiple Campaigns At Once
If you are tracking Instagram Stories from unauthenticated influencers in multiple campaigns, you can add and save the media to all campaigns at once. Previously, this needed to be done separately for all relevant campaigns.
Mass Email Outreach Updates
Follow Up With Specific Mass Email Recipients
Use the following steps to send a Mass Email to segmented Outreach recipients:
- Navigate to the Mass Email campaign you want to follow up in
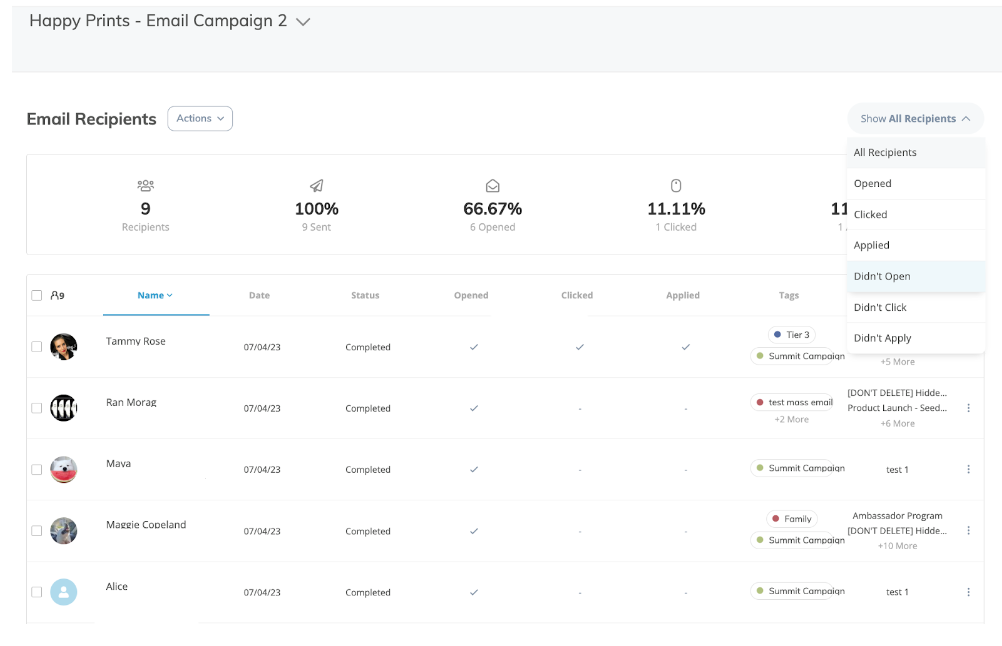
- Use the Recipients dropdown at the top right to check the segment you want to send to. The following options are available:
- All Recipients
- Opened
- Clicked
- Applied
- Didn’t Open
- Didn’t Click
- Didn’t Apply
- Use the checkboxes next to each influencer to select who to send to, or use the top checkbox to select all
- Use the Actions dropdown and select Send Mass Email
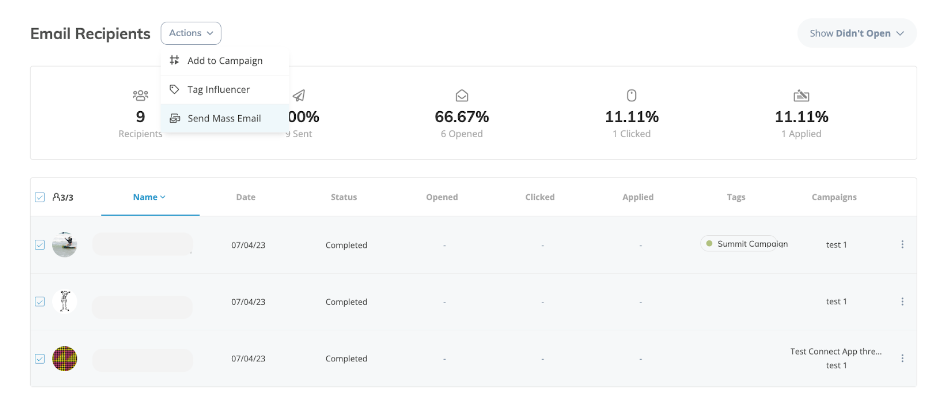
- Follow the prompts to confirm emails, finalize your message, and hit Send
- Once sent, you can track your new Mass Email campaign in Recruit.
Send Mass Email to Recruit Applicants
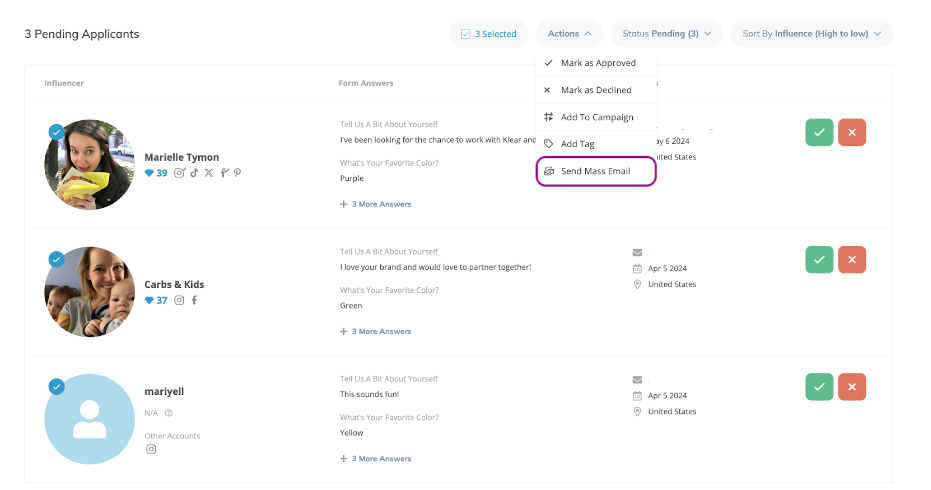
You can also send Mass Emails to applicants directly from Recruit. Within Recruit, navigate to the relevant application. To take action on multiple influencers from your applicant pool at once:
- Hover over the profile pic of each influencer you’d like to select, and click the circle that appears. This will include them in your bulk action
- Select each influencer you want to include. As you select more influencers, the Pending Applicants text at the top of the page will update to reflect the total number selected
- Once you have selected all the influencers you want to include, use the Actions dropdown and select Sent Mass Email
Learn More in the Help Center
Export Updates
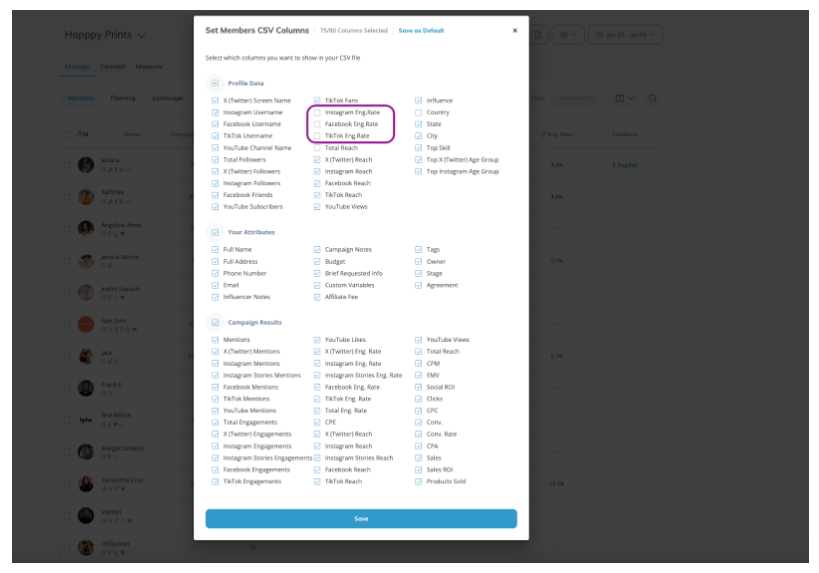
Social Engagement Rate in Member Export CSV
When exporting influencers via the Members CSV export, you can now include their engagement rate across Instagram, Facebook, and TikTok.
Learn more in the Help Center: Klear: Creating and Sharing Campaign Reports With Stakeholders > CSV Reporting Options
Export Campaign Deliverables
The Export functionality has been added to Campaign Deliverables in Planning mode. To get started:
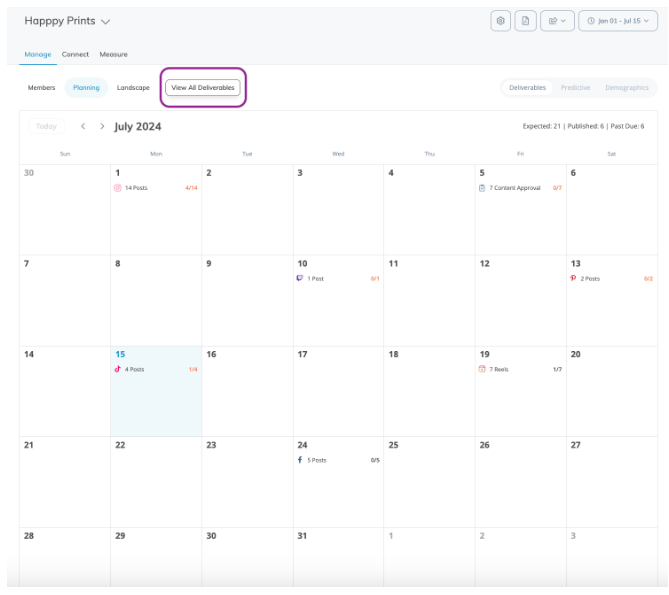
- Navigate to Planning mode in your campaign, in the Deliverables view
- Click the View All Deliverables button
- Click the Export button at the top right
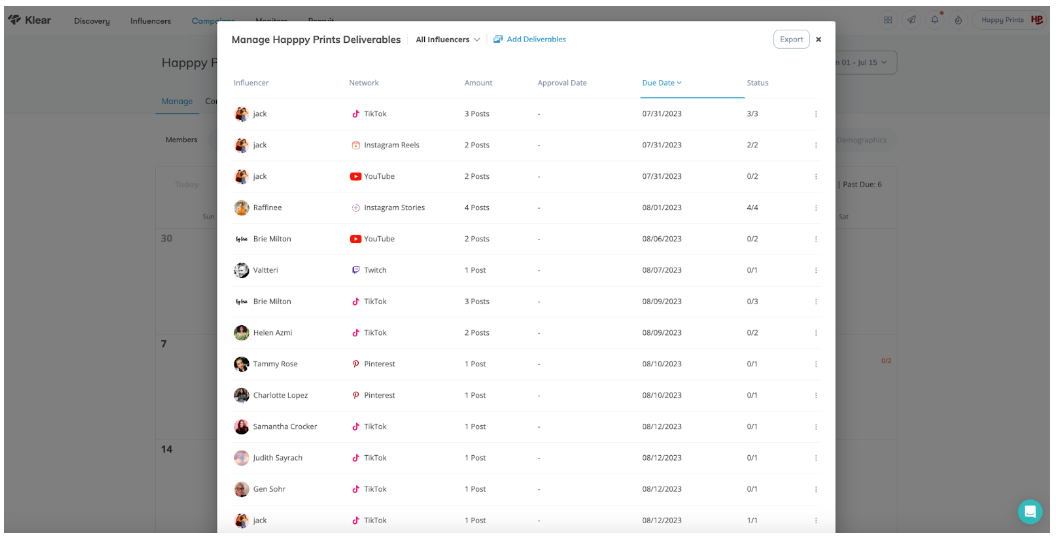
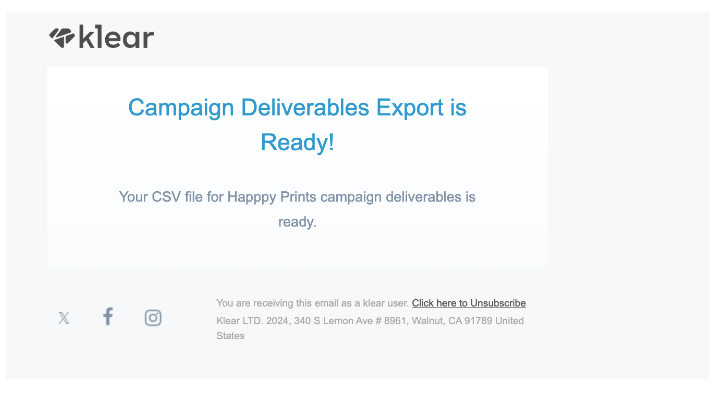
- Your Deliverables export will process. Once complete, you can download this directly from Klear, or from your email status update
Learn more in the Help Center: Klear: Creating, Editing, and Managing Deliverables
